Who doesn’t dream of that easy, sun-kissed balayage look without having to commit to bleaching or forking over cash for a salon appointment? You’re not alone.
Want something subtle and natural? Want a little extra glow for summer? We’ve got a few tips to help you fake balayage and it all starts with extensions!
At SWAY, we make it easier than ever to get that perfect, salon-style finish in minutes. This guide breaks down how to achieve sun-kissed hair using mixed-shade or balayage clip-ins, all without a drop of dye!
Can You Fake Balayage with Hair Extensions?
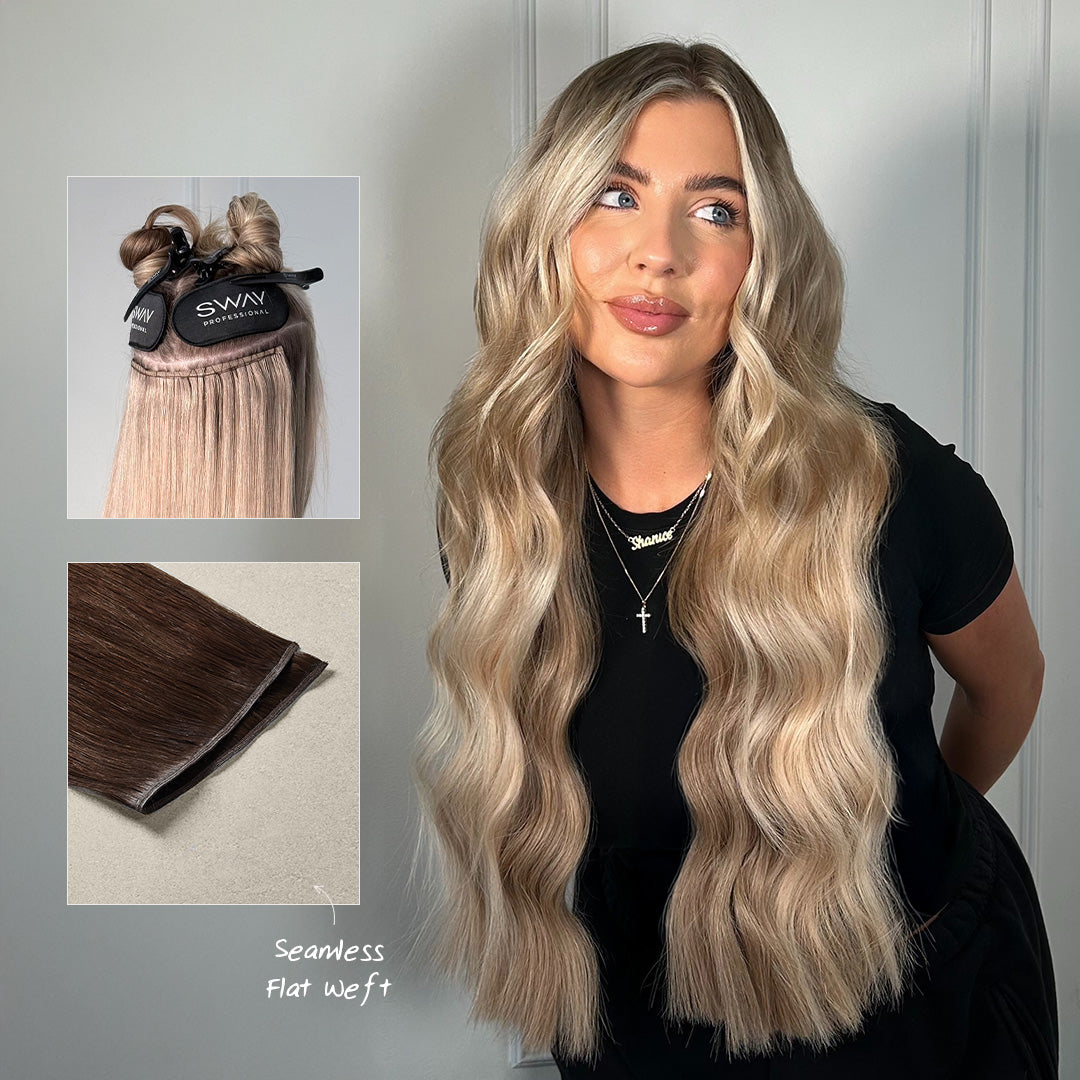
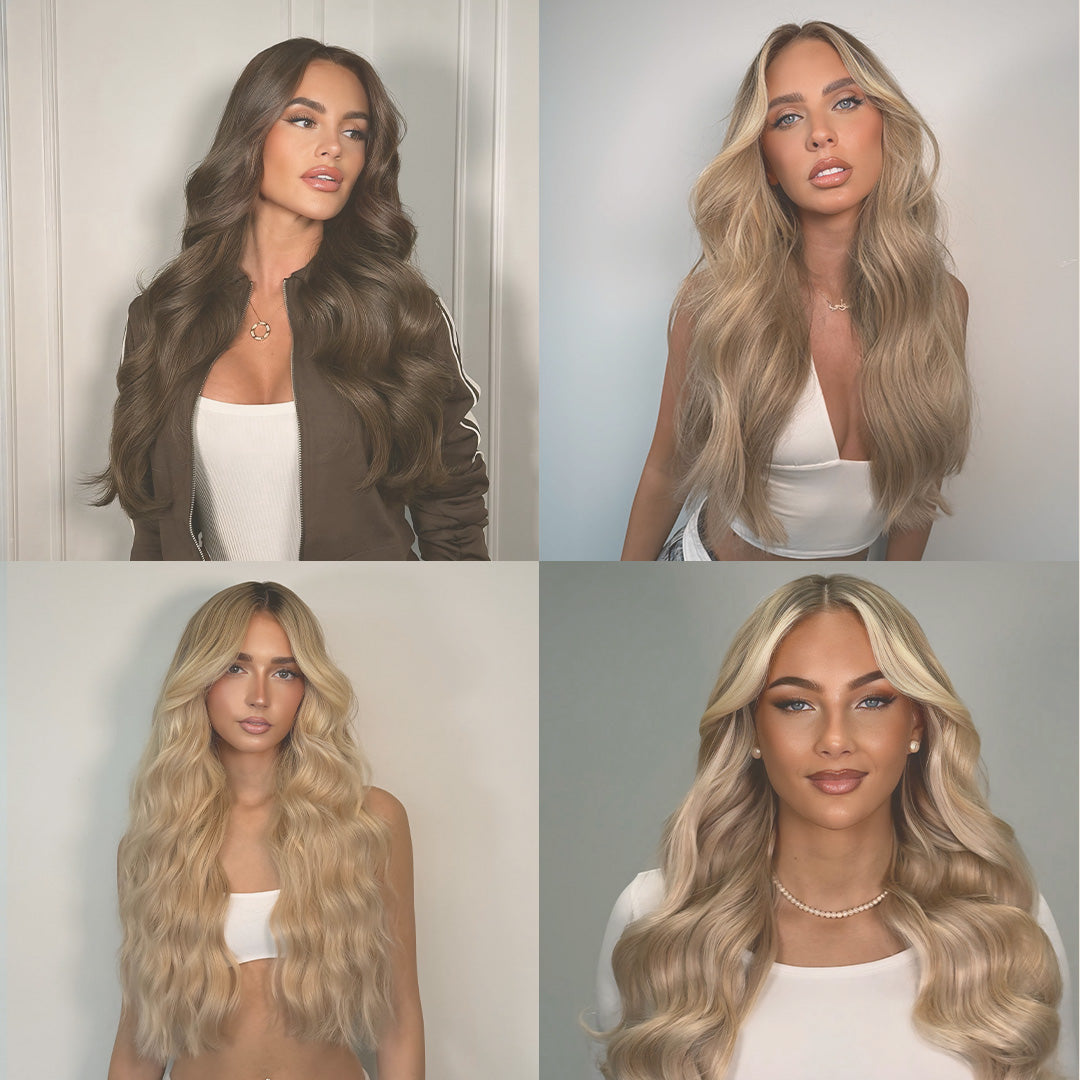
You bet you can! And, boy, does it change everything. Balayage and mixed-shade clip-in extensions create that exact look of a natural ombre, adding depth, dimension, and that perfect sun-kissed effect we all love.
SWAY's clip-in balayage extensions are a modern version of a natural root lift and dark ends. Whether you're blonde, brown, or a mixture of both, there's a shade for everyone that will help you stand out without damaging your own hair.
Choosing the Right Balayage Clip-In Extensions
Not all balayage clip-ins are created equal. To get the most realistic look, it’s essential to choose the right colour shade and quality. Here’s what to keep in mind when picking your perfect match from SWAY:
Match the Root, Not the Tip
When purchasing a balayage or ombré clip-in set, you will want to choose the root colour to be the same as your own natural hair at the crown. This is so that they will blend in well and look natural when clipped in.
Choose Remy Human Hair for the Best Results
One of the best ways to make your balayage look natural is by using 100% Remy human hair. Because it is so much like your own hair, you can wash, curl, and style it any way you like without it looking fake or frizzy.
Consider the Length and Volume
Balayage effect works best on longer lengths, so you'll get the best effect on 20" or 22" sets as the blend of colours and the contrast will really show off. If you're after the beach wave look or layered style, you can trim them to fit your current style.
How to Clip In YourBalayage Hair Extensions for a Natural Look
A lot of what goes into that perfect balayage glow-up is already built into the extension itself. However, where you apply your clip-ins can take the look from good to great. Even if you’re a newbie to extensions or an experienced pro, this is how you get the perfect glow-up every time.
Step 1: Start with Clean, Dry Hair
Make sure you wash your hair or brush out any products before you clip in. Extensions look best on clean, dry hair.
You will get a more natural look without any excess oils or products weighing it down. You can use a professional paddle brush to eliminate any tangles.
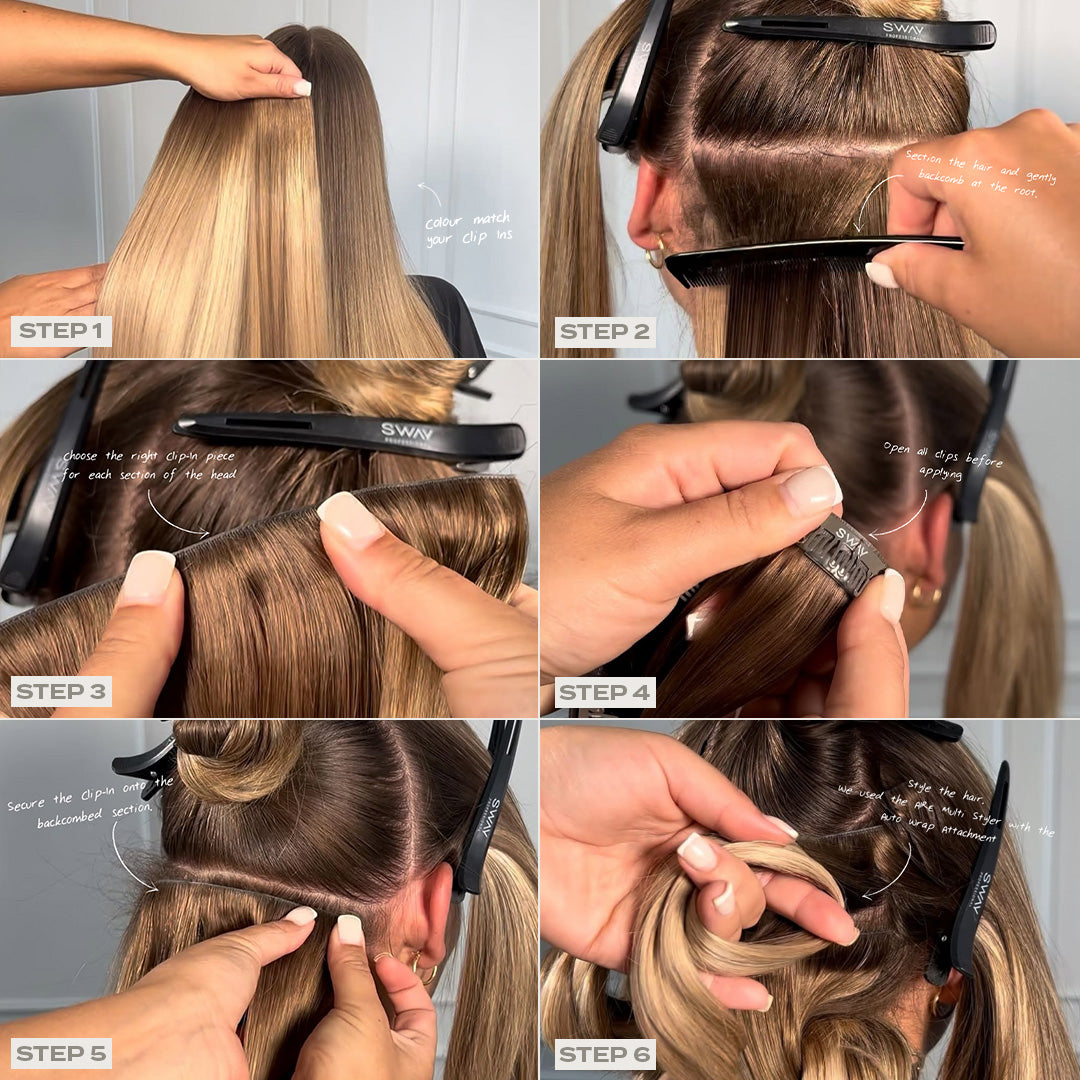
Step 2: Section Your Hair Like a Pro
Start by creating a horizontal part from ear to ear with a pintail comb or your fingers and clip the top half out of the way. Starting with the bottom layer at the nape of your neck, work your way up. The lower layers are best for placing the darkest wefts as the base for your balayage blend.
For a multi-tonal effect, you can use a different shade for each layer, with the darkest wefts on the bottom and lighter balayage wefts moving up the head. This layered approach mimics the natural balayage gradient to create dimension and depth through the lengths.
Step 3: Clip in the Extensions Strategically
Each piece should fit the shape of your head. Place the clips as close to the root as possible and make sure they lie flat and are secure.
Press firmly to fasten each clip. If you have very fine hair, you may want to tease the root before clipping so that the extension has something to hold onto.
For the best results, you should not clip the extensions too close to your hairline or part. A layer of your natural hair should be above the top to cover the clips and provide a more natural colour blend.
Step 4: Mix and Blend the Colours
One interesting thing aboutbalayage hair extensions is that they are already blended in two or more tones. But, that doesn’t mean you can’t blend them even more. If you happen to have two different sets of balayage (one cool and one warm, for example), don’t be afraid to lay them on top of each other for a customised look.
Custom layering will give you that multi-dimensional look, which is great for light reflection. It will make your hair appear fuller, thicker, and more professional-looking, without ever leaving your house.
Step 5: Style to Finish the Look
Once your extensions are cut in, you’re ready to start playing with the true magic of how you want to style. Curled hair shows off the real beauty of your balayage!
Curly, loose waves, and braids are all good options that will give your balayage a softer, effortless look. You can even curl your hair and extensions together with a curling wand or straightener.
When styling, curl away from your face for more volume, and remember to curl the extensions and your own hair together, don’t separate them. Finish off with a SWAY hair oil to get that added shine and softness. Lastly, make sure to brush your hair with a professional oval brush or your fingers to loosen your curls for that ultimate sun-kissed look.
Styling Tips for a Sunlit, Multi-Tonal Finish
Do you want your fake balayage to look like a pro put it there? It’s all in the styling. Here are our tips for getting the most out of your extensions, no matter what you’re wearing.
Go for Soft Waves
The secret to Balayage at its finest is waves. Softer, beachier curls let those different tones shine through and make the colour even more natural. Your new best friend will be the AIRE multi-styler to help you achieve those soft waves.
Switch Up Your Parting
With the style of your hair, you'll probably find that a middle part gives you the smoothest, most symmetrical finish. However, you could also try a side part to add a little dimension and show off the colour shifts. Try both and see which works best for you.
Looking After YourBalayage Hair Extensions
For proper care of your balayage clip-in extensions, it’s important to provide them with the attention and care they deserve. Just like your natural hair, high-quality SWAY hair extensions need a little bit of attention and care to keep them looking soft, bright, and looking like new every time you clip them in.
Before and after each use, gently brush your extensions with a professional paddle or oval brush. Start at the bottom and work up to avoid pulling and breaking the wefts. When brushing, hold the top of the weft with your hand to avoid extra tension on the clips.
As for washing, less is more. Because your extensions aren’t being exposed to natural oils from your scalp, they don’t need to be washed as often as your natural hair. Wash them every 10-15 wears or when you feel they're feeling weighted down.
Use a sulfate-free, hydrating shampoo and conditioner to keep the balayage tones. Wet them down in lukewarm water and do not wring or twist the hair, just lather and rinse. When using blow dryers, curling wands, or straighteners, make sure to use a low heat setting (no more than 180 degrees) and a heat protectant spray.
Fake It, Flaunt It, Love It With SWAY Hair Extensions
We love balayage for that natural-looking sun-kissed look that you can’t achieve with bleach alone. With SWAY’s balayage clip-in extensions, you can have that sun-drenched look on demand.
If you want warm browns, golden blondes, or anything in between, you’ll have your custom colour with our extension collection. We make it easy to play with shades and volume, without the worry of maintenance or damage.
The best part is they’re yours to do whatever you want with. You can change your shade, mix and match lengths, and go from blond to brunette and back again, all while making zero changes to your hair. There are no limits to your creative freedom when you have extensions.
So fake the balayage, flaunt the glow, and fall in love with your hair all over again. We’ve got the power in your hands with SWAY. Your sun-drenched hair goals are always in reach: no dye, no damage, just gorgeous results!
Balayage Hair Extensions: FAQs
1. Can I wear balayage extensions if I have short hair?
Absolutely! You’ll just want to trim the extensions slightly to blend with your natural length. A soft wave or layered cut helps everything merge together naturally.
2. Will balayage extensions look natural if my hair is very dark?
Yes! Just choose an option with a darker root and light mid lengths and ends. Our balayage extensions come in a mixed-shade set that works perfectly for brunettes too!
3. How long will clip-in balayage extensions last?
With proper care, SWAY extensions can last up to 12 months and longer. The more you take care of them, the longer they will stay soft and shiny.
4. Can I use heat styling tools on balayage extensions?
Yes. You can curl, straighten, and style your extensions just like your natural hair. When styling, make sure you use a heat protectant spray and don’t go above 180 degrees.
5. Will people be able to tell I’m wearing extensions?
Not if they’re applied correctly! Blending is key. Using layers, styling with waves, and matching the root colour will give you a totally natural finish.


 Powered by
  – finance available up to 24 months