Textured hair is vibrant, versatile, and apologetically full of life. But styling it especially when adding volume or length can sometimes be more work than fun.
Looking to elevate your natural texture with some added fullness or length? Tape-in extensions are one of the best options for textured hair. That said, blending them in naturally takes the right technique and a little know how.
At SWAY, we understand that textured hair comes in a wide range of patterns, from waves and curls to coils and kinks. That’s why we’ve created a step-by-step guide on how to choose the right tape-ins and blend them like a pro. Whatever your texture, here’s how to make your extensions look seamless and feel like part of your natural hair.
Why Tape-Ins Are Great for Textured Hair
Tape-ins use ultra-flat, lightweight bonds that sit close to the scalp without causing bulk at the roots. This makes them ideal for textured hair types, allowing natural movement while avoiding heaviness.
They’re easy to install, remove, and reapply with minimal stress on your strands. SWAY’s premium Remy human hair extensions can be washed, styled, and treated just like your own, making them the perfect match for your natural texture.
Choosing the Right Texture Match
Every curl, wave, or coil pattern is unique and achieving a seamless blend with hair extensions depends on finding the right texture match.
While we don’t currently stock textured hair extensions, our premium tape-in extensions can be a great option. They can be styled with heat tools to better mimic your natural pattern, whether you have soft waves, defined spirals, or tighter coils. This flexibility allows you to customise the look for a natural, cohesive finish.
Preparing Your Hair and Extensions
1. Wash and Dry Before Installation
Before applying your extensions, make sure both your natural hair and the tape-ins are clean and completely dry. Use a hydrating, sulphate-free shampoo and skip oils or conditioners near the roots to ensure the adhesive sticks properly.
2. Detangle and Section
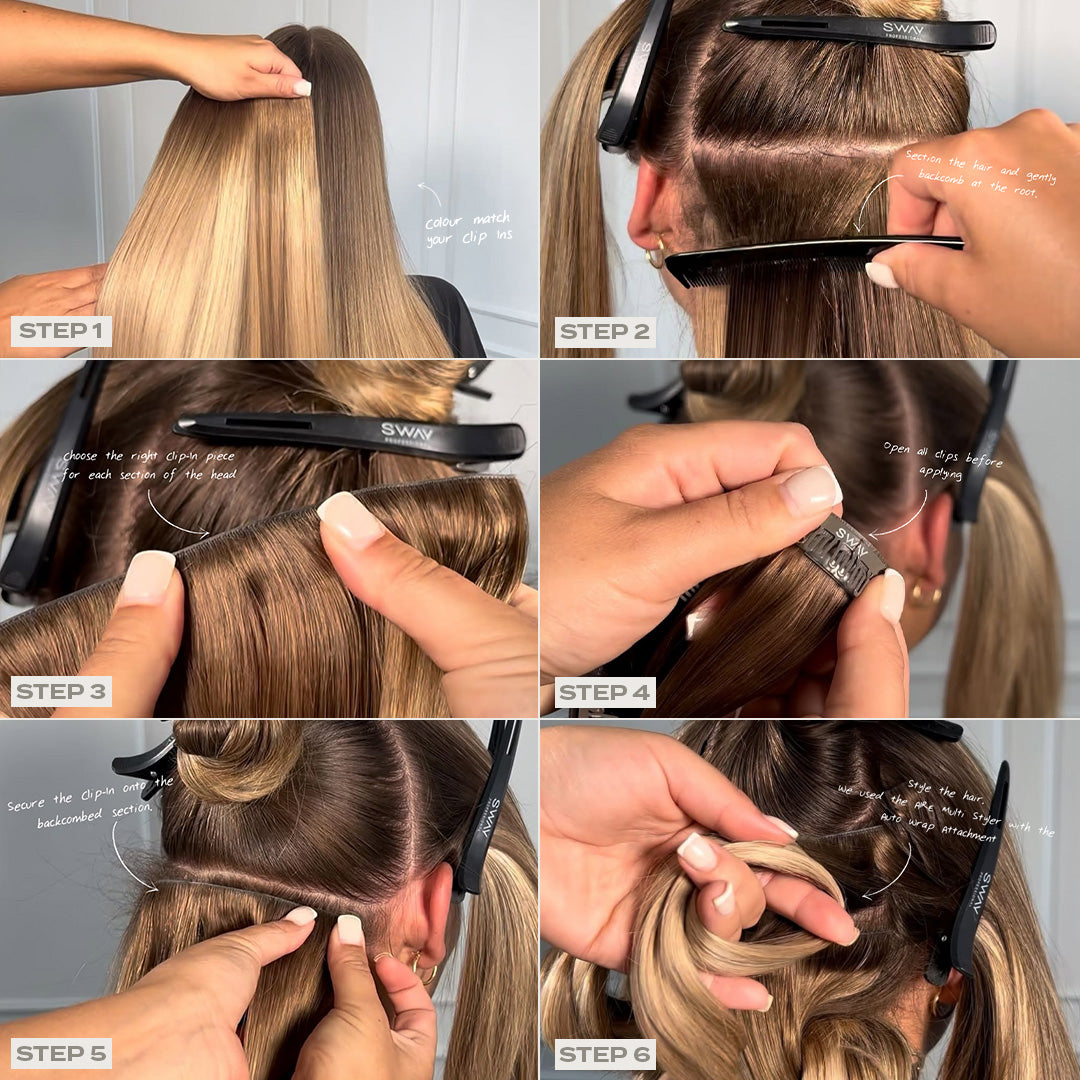
Textured hair tends to tangle easily, so starting with a clean, detangled base is key. Use a wide-tooth comb or professional oval brush and section your hair neatly with clips to allow precise, horizontal partings for tape placement.
Installing Tape-In Hair Extensions
Placement is Key
Proper placement ensures your extensions blend naturally with your texture. Avoid placing tape-ins directly along your hairline or crown. Instead, position them slightly away from your scalp and allow your natural hair to fall over and conceal the bonds.
Use the Sandwich Technique
Sandwich a small section of your hair between two adhesive wefts. For textured hair, use smaller sections to maintain control and ensure an even blend. Take your time to align the wefts and gently press for secure adhesion.
Blending Like a Pro
Define Your Texture
Even with a close texture match, your extensions might curl or wave slightly differently. This is normal. Use your go-to styling method—whether it's finger-coiling, twisting, or rod-setting—on both your hair and the extensions to bring everything together.
Apply a leave in product like The Hair Hero, then scrunch and air dry or diffuse for a uniform texture.
Trim to Shape
Textured hair typically follows a specific shape more volume up top, shorter layers in front, or fullness around the crown. Once your extensions are in, visit a stylist who specialises in textured cuts to shape the extensions to match your natural silhouette.
Diffuse for a Seamless Finish
Use a diffuser on low heat and airflow to dry your hair and extensions together. This helps maintain your curl or wave pattern and prevents frizz. Be sure to apply a heat protectant and avoid touching your hair while drying.
Day-to-Day Styling Tips
Be Gentle with Heat
Remy extensions can handle heat, but less is more. When using hot tools to touch up or define, always apply a protectant first. Avoid over-straightening, as repeated heat styling can loosen the pattern and make blending harder.
Minimise Product Near the Roots
Heavy creams and oils can weigh hair down and compromise the adhesive. Apply products from mid-length to ends to keep your bonds intact and your style fresh.
Care and Maintenance
Watch for Signs
As your hair grows, your extensions will move with it. Around 6–8 weeks in, it’s time to visit your stylist for removal and reapplication. With proper care, your extensions can be reused and last up to 12 months.
Clean and Condition Carefully
Wash with sulphate free shampoo, focusing on your scalp. Apply conditioner to your lengths and ends, and detangle gently with fingers or a wide-tooth comb. Avoid brushing when wet and do not leave extensions to air dry, as this can trap moisture near the roots.
Confidence Starts with the Blend
One of the best parts of wearing tape-in extensions, they blend so naturally that no one will know they’re there, but everyone will notice your gorgeous hair.
At SWAY, we’re proud to support all types of hair. Whether you want to enhance volume, add length, or switch up your look, our premium human hair tape-ins are designed to blend effortlessly and move beautifully—just like your natural hair.
Tape-In Hair Extensions: FAQs
1. Will people be able to tell I’m wearing extensions?
Not if they’re installed and blended correctly. With the right texturematch and placement, tape-ins look completely natural.
2. How long will they last?
With good care, tape-ins last about 6–8 weeks between installations. The hair itself can be reused for up to 12 months with the SWAY Hydrate System.
3. Can I swim with them?
Yes! Just tie or braid your hair beforehand and rinse with clean water before swimming. Wash and condition right after to remove chlorine or salt.
4. Should I go to a stylist for installation?
Absolutely. A experienced stylist can apply and shape your extensions for the most natural looking results.
5. Can I colour my extensions?
We don’t recommend colouring SWAY extensions. They’re already coloured and chemically processed. Instead, book a free colour match with us to find your perfect shade.


 Powered by
  – finance available up to 24 months